Monday, 26 January 2015

Designs for set


Design for set


In this post I will be showing my different drawings and designs for my background for my visual 3d art. As you can see there is numerous drawings for ideas. I was drawing more images I found through primary sources from home or in town at shops, and secondary sources like books, internet and magazines. The Ideas varied from things such as bane from batman, to skates and pokemon.
 
This was my original idea for my set design and it was also my first armiture i created but moved onto other ideas.


 This is my final set design peice that i created with 2 different colours to differenciate the colour between the sky and the ground. i used fishing line to attach to the ball to make it float and look like its going through the air like it has been thrown.
 
This was the first background i drew with pastels and used different colours to create the illusion of cliffs, ground, earth, rocks, and sand. 


This is another close up of my background to have a better view of the set design. Also you can see the armiture i created inside of the mod roc house i created aswell with wire for the frames. I painted the little house numerous colours to give the illusion of camoflauge.


I drew these skates because i was going to create a skate scene but i couldnt create it in time so i had to go with my final idea.


This is a close up of my drawings in the background of my set. i had fun drawing this and creating different blends of colours and pencil shadings to try make it look like feathers.
 
 
Criteria for unit 3
Criteria Covered by the Tasks
To achieve the criteria you must show that you are able to:
Task No
Unit
Criterion reference
demonstrate use of 3D making techniques safely when working from primary and secondary sources
1
3
P1
demonstrate consistent and effective use of 3D making techniques when working from primary and secondary sources
1
3
M1
demonstrate imaginative and independent use of 3D making techniques, when working from primary and secondary sources
1
3
D1
communicate design ideas using 3D visual communication techniques
2
3
P2
communicate ideas effectively and consistently, using 3D making skills
2
3
M2
communicate ideas imaginatively and independently using 3D making techniques
2
3
D3
use formal elements in 3D visual communication.
3
3
P3
Explain the use of formal elements in 3D visual communication.
3
3
M3
evaluate the use of formal elements in 3D visual communication.
3
3
D3

Criteria Covered by the Tasks
To achieve the criteria you must show that you are able to:
Task No
Unit
Criterion reference
demonstrate use of 3D making techniques safely when working from primary and secondary sources
1
3
P1
demonstrate consistent and effective use of 3D making techniques when working from primary and secondary sources
1
3
M1
demonstrate imaginative and independent use of 3D making techniques, when working from primary and secondary sources
1
3
D1
communicate design ideas using 3D visual communication techniques
2
3
P2
communicate ideas effectively and consistently, using 3D making skills
2
3
M2
communicate ideas imaginatively and independently using 3D making techniques
2
3
D3
use formal elements in 3D visual communication.
3
3
P3
Explain the use of formal elements in 3D visual communication.
3
3
M3
evaluate the use of formal elements in 3D visual communication.
3
3
D3

Monday, 19 January 2015


Thomas Rowlandson


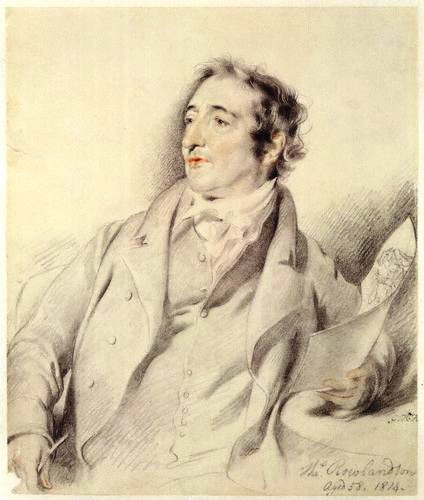
Thomas Rowlandson was born in Old Jewry which is a city inside of London. He was educated at the school of Dr Barvis in Soho square around the years of 1765- 1766. As a school boy Thomas drew funny images of his master from a young age around 10 year old. When he grew up and progressed throughout his art career, he developed a humorous creative technique towards the royal family and politicians in a comic style.

this is some of the work created by Thomas Rowlandson

Thursday, 15 January 2015


Evaluation
I initially started the subject by doing by creating clay figures to make people, creatures and also animals. Then we moved onto creating armatures out of plastiscine and wire to make frames out of them to make a skeleton for our figures. Then we created our sets out of greyboard by cutting up pieces measured up to our armatures. I used armature, modelling, crafting and structure techniques in creating these armatures and clay figures. For our set designs I used set designs, construction, design and sketch techniques to build the box.

i used colour and line to create my drawings for my background and whilst using the mod roc for creating items for my scene i used several layers of mod roc to create the rough texture to make it feel like it had been used before. i painted the ball i made to create the scene that bit more.

I followed the health and safety by using the Kevlar gloves whilst using the Stanley knife and cutting the wire out for my armature and the structure for my set. I do have photo evidence but I shall upload it when I receive my phone back.


Monday, 12 January 2015


Animation Research


this is a short video of the critically acclaimed "Aardman animation" series "Morph." Morph is the series that was created by Peter Lord and David Sproxton for the TV debut 1977 children's BBC art programme "Take hart." Peter Lord and David Sproxton are the co-founders of Aardman animations and went on to become a regular show on children's television in the 70's and 80's.


In the video below the man called Enty who is the head of model making at Aardman animations will describe the process on how to create plastercine models with armatures made of wire. An armature is basically wire shaped into a skeleton for the model which creates the freedom of moving without ripping or tearing the plastercine so you can use the model again and again for different positions.


Typography illustrations

Typography illustration's